Showing posts with label Journeyman. Show all posts

Monday, October 29, 2018

Journeyman Guide - Minions (Farrow)

So, my friends over at Line of Sight have been creating Journeyman League guides all year. These guides are designed to fit a relatively competitive list into a Journeyman League and have been very instructional to read. However, when asked, in a semi-jesting tone, about a Farrow Journeyman League guide, I was informed it would not be happening until Farrow received a CID.

This makes me sad. I love the Farrow. I love the models, I love the fluff, and I love the tactics. While they are probably never going to be top tier armies, I believe they can be very serviceable and quite surprising in their effectiveness. So, I've decided enough is enough, it's time to put away the shiny new toys (AKA Gatormen) and return to the faction (or at least, sub-faction) that has my heart!

With all of that in mind, I'd like to start out by writing my guide to a Journeyman League that features Farrow. I will be starting with the suggested battlegroup in JL2018 rules (since Farrow don't have a battle box) and proceed from there. A special thanks to Jaden at Line of Sight for his help with suggestions and bouncing ideas off.

For this guide, we are going to be looking at two effective warlocks in two different themes (The Thornfall Alliance and Will Work for Food). Just a reminder, Journeyman Leagues follow a points progression each week, as follows:

Week 1 - 0-point Armies
Week 2 - 15-point Armies (battlegroup only)
Week 3 - 30-point Armies (theme forces allowed)
Week 4 - 45-point Armies (caster swap allowed)
Week 5 - 60-point Armies
Week 6 - 75-point Armies

Also, remember that once you have added a model to your army, you have to keep it in your army - except Week 4 when you are allowed to swap your caster.

WEEK ONE

As previously stated, Farrow has a special battlegroup used in Journeyman Leagues, since they don't have a retail battle box. That battlegroup consists of the following:

Helga the Conquerer [+29]
- War Hog [15]
- Battle Boar [7]
- Razor Boar (2) [7]

Helga is mainly used with infantry to set up assassinations; however, while not overtly strong, this battlegroup does give some interesting play.
  • The Razor Boars can be used to provide some Countercharge protection for Helga, as well as being useful on her feat turn to slam models, clearing a path for her assassination run.
  • Typically, the Battle Boar is used to clear infantry (which it does very well with Adrenalize combined with its animus Primal) and to provide extra punch with its animus. While useful at this level, it will really shine at later point levels.
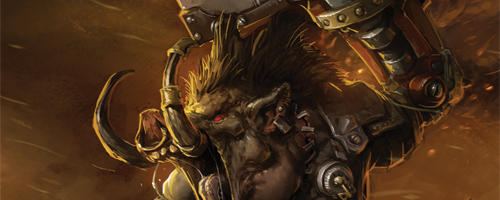
  • The War Hog is the front-line beatstick of the Farrow, with good reason. Aggression Dial gives it +2 STR (making its axes P+S 18) and with three initials can easily destroy opposing heavies, especially with Primal! Also, don't forget the critical knockdown on its tusks!
  • Helga, as mentioned, is mainly an assassination warlock, especially at this point level. Dash and Cyclone can give her an extreme threat range, and her feat can be used in multiple ways, all designed to make the enemy easily hit and dispatched. Put Defender's Ward on a War Hog and suddenly you have a DEF 14/ARM 20 heavy that is going to be very difficult for an enemy to deal with!

WEEK TWO

This week is a fairly easy decision, as no matter what direction we go in the future, the same addition is made - an additional War Hog. This vanguard heavy rewards both of our future warlocks with increased hitting power and durability, as well as being an effective addition (and easily added at 15 points!) at this point level.

Helga the Conquerer [+29]
- War Hog [15]
- War Hog [15]
- Battle Boar [7]
- Razor Boar (2) [7]

WEEK THREE

Ah, now it's time to see some divergence in our lists. The Thornfall Alliance theme rewards more of a combined-arms approach (especially with the proposed warlock) while Will Work for Food is more solo centric, alleviating some of the issues facing Farrow warlocks.

Thornfall Alliance Will Work for Food
For The Thornfall Alliance theme, it's an easy week - we are going to start building up our infantry presence! This is done by adding a min unit of Farrow Brigands with their command attachment, the Farrow Brigand Warlord. The Brigands are an extremely effective unit, with Dig-In and Hog Wild, and get even better with Prey and Reposition [3"] from the Warlord. Also, Brigands will be forming the backbone of the army under this theme.


Helga the Conquerer [+29]
- War Hog [15]
- War Hog [15]
- Battle Boar [7]
- Razor Boar (2) [7]
Farrow Brigands (min) [9]
- Farrow Brigand Warlord [4]

In the Will Work for Food list (we actually aren't taking the theme yet), things are a little more complicated. We are actually setting up to have a big week next week, so we are only taking solos (again, we aren't applying the theme yet, so they are not free) and will be playing points down.

We are going to start with adding a Gatorman Witch Doctor. The Witch Doc Croc (I just love saying that!) has one major ability we are counting on, and a couple minor ones. First, he grants Ghostly. This is huge, as it basically gives Pathfinder to one of our 'beasts, which is really difficult for Farrow warlocks to pass around. He does have two minor benefits as well - a Magic Weapon (seriously lacking in this list) and Sacrificial Strike (used as a last ditch effort in assassination typically).

Next, we are going to add Lanyssa Ryssyl, Nyss Sorceress. This little lady helps in all sorts of ways - Hunter's Mark speeds up our army (and our 'beasts charge for free!) while Ice Bolt can provide a surprising magical attack if needed. She has Prowl to help her survive being sniped out, as well as a very good DEF 15, which means she will be able to camp flags if necessary.

Our last addition this week will be the conjoined twins Kwaak Slickspine & Gub, Croak Sorcerers. The little guys, joined at the waist, are able to cast two spells a turn - and they have some good ones! Enliven can speed up the warbeasts, getting them in position that much quicker, or allow them to back up from a charge. Heal has obvious benefits, getting our 'beasts back into fighting shape. A Venom or two can help thin the opposition's ranks, allowing our big heavies to get where they want to be. And Mudfoot, which I actually dislike due to its short range, can still be used to slow down the enemy and make them re-evaluate their plans. Be careful with them, though, as they have an easily hit DEF 12 and no weapons (which means they can't engage models or get free strikes).

Helga the Conquerer [+29]
- War Hog [15]
- War Hog [15]
- Battle Boar [7]
- Razor Boar (2) [7]
Gatorman Witch Doctor [4]
Lanyssa Ryssyl, Nyss Sorceress [4]
Kwaak Slickspine & Gub [4]

WEEK FOUR

Ah, Week Four - time to swap out Helga for a different warlock. While Helga can be a fun warlock, the two new 'locks are the defining warlocks in the Farrow sub-faction - at least in my opinion. Lord Carver is an awesome caster, able to excel in a variety of situations, while Dr. Arkadius can easily turn his battlegroup up to devastating levels.

Thornfall Alliance Will Work for Food
Adding Lord Carver, BMMD, Esq III at this point level drops a warbeast point, but that's okay as we were playing two points down last week. With Batten Down the Hatches and Mobility, Lord Carver makes his battlegroup both tougher (+3 ARM) and faster (+2 SPD and Pathfinder), allowing for greater threats on a consistent basis. Be careful, though, as this will leave him with no fury each round - make sure you keep him protected! Also, his feat allows his army to go bonkers - an additional die (so you can still boost!) on damage rolls and Overtake makes for a devastating alpha. Finally, his Veteran Leader ability makes all of the Farrow warriors around him more accurate - really helping the Brigands.

Speaking of protecting Lord Carver, we will be adding a unit of Farrow Valkyries at this point level. These ladies bring Shield Guards to the table, as well as some offensive capabilities that can be surprisingly dangerous in Vengeance and Gang.

To finish out the points at this level, we maximize the unit of Brigands (after all, who doesn't like more guns?), which gets us to a level that we get a free model. :) We will be using that free model on ...

Lanyssa Ryssyl, Nyss Sorceress. See above for why she is such a good add for the Farrow.


Lord Carver, BMMD, Esq. III [+28]
- War Hog [15]
- War Hog [15]
- Battle Boar [7]
- Razor Boar (2) [7]
Lanyssa Ryssyl, Nyss Sorceress [0]
Farrow Brigands [15]
- Farrow Brigand Warlord [4]
Farrow Valkyries [8]


Dr. Arkadius has three more warbeast points than Helga, and we are going to take advantage of that to diversify some of the 'beasts being added over the next few point increases. The mad doctor also brings some serious battlegroup abilities that make his warbeasts living terrors - spells like Forced Evolution (+2 STR and DEF) and Psycho Surgery (each model in battlegroup heals D3+1) make his warbeasts very difficult to kill; his feat (all warbeasts he controls may immediately Frenzy) and Aggravator (his warbeasts gain Hyper-Aggressive) increase his battlegroups threat ranges; and Forced Evolution, Crippling Grasp (-2 SPD, STR, DEF, and ARM to target unit/model), and Raw Adrenaline (from his Needle) all make killing things easier.

With his increased battlegroup points, we are going to diversify his battlegroup by adding the second heavy available to Farrow warlocks - the Road Hog. This 'beast loves to get stabbed by Needle, allowing all attacks made from his flame thrower (a SPR 10 weapon!) to be fully boosted! And with a SPD boost and Assault, those flames can really reach out and touch something. :) His animus, Sprint, also allows him to attack and retreat as necessary to continually apply flame thrower where needed.

We are also going to activate the Will Work for Food theme force, to make the three solos free. The way we get three solos free is to also add Dahlia Hallyr & Skarath. Yes, you're reading that right - this week we are adding TWO heavy warbeasts to our list, as well as a lesser warlock with tricks up her sleeve. What tricks? First (and most obvious) is Haunting Melody, which prevents living enemies from receiving orders (which means no charges) and prevents Dahlia from being attacked! She also has Mist Walker, which gives a model in her battlegroup (normally Skarath) Pathfinder - remember, this is rare for Farrow lists. And she brings Skarath - who has an awesome spray (SPR 10 corrosion!) that benefits from Arkadius' Needle, just like the Road Hog. And with Counterblast, it can shoot its spray at anyone engaging it in melee - nice!

Dr. Arkadius [+32]
- Road Hog [16]
- War Hog [15]
- War Hog [15]
- Battle Boar [7]
- Razor Boar (2) [7]
Dahlia Hallyr [17]
- Skarath
Gatorman Witch Doctor [0]
Lanyssa Ryssyl, Nyss Sorceress [0]
Kwaak Slickspine & Gub [0]

WEEK FIVE

Both lists this week are going to add a little more shooting, surprisingly, but in much different methods. Note both lists are still playing down a couple points - Lord Carver by two and Dr. Arkadius by one - but this will be mitigated next week.

Thornfall Alliance Will Work for Food
Lord Carver will be adding a second unit of max Farrow Brigands, for much the same reasons as the first was added. I've consistently seen a full unit of these guys put some major hurt on opposing armies, killing heavies and decimating infantry. And with the points from the max unit, they get to add their command attachment for free - bonus!


Lord Carver, BMMD, Esq. III [+28]
- War Hog [15]
- War Hog [15]
- Battle Boar [7]
- Razor Boar (2) [7]
Lanyssa Ryssyl, Nyss Sorceress [0]
Farrow Brigands [15]
- Farrow Brigand Warlord [4]
Farrow Brigands [15]
- Farrow Brigand Warlord [0]
Farrow Valkyries [8]


Dr. Arkadius continues to add to his battlegroup, bringing a second Battle Boar this week. He also works on fixing a couple of small issues with this list - namely clouds and Magic Weapons - by including a Bog Trog Mist Speaker. This allows one of your heavies to ignore clouds, as well as deal with pesky Incorporeal models. Or, if those aren't helpful, brings a small cloud around with him so the good Doctor can hide.

Speaking of clouds to hide in/behind, we are also going to tack on a Swamp Gobber Bellows Crew. These little guys bring a big cloud, helping Lanyssa hide or just providing concealment on the approach. They are also good for holding zones, since they will be DEF 17 vs shooting and have such a small footprint they can be difficult to remove.

We are playing down points again, but that is to set up a big final week.

Dr. Arkadius [+32]
- Road Hog [16]
- War Hog [15]
- War Hog [15]
- Battle Boar [7]
- Battle Boar [7]
- Razor Boar (2) [7]
Dahlia Hallyr [17]
- Skarath
Bog Trog Mist Speaker [4]
Gatorman Witch Doctor [0]
Lanyssa Ryssyl, Nyss Sorceress [0]
Kwaak Slickspine & Gub [0]
Swamp Gobber Bellows Crew [2]

WEEK SIX

Ah, week six - the final week of the League. By now, you've hopefully played lots of games and have a firm grasp of your armies. You've also, hopefully, been keeping up with the painting and have a fully painted army to play with! :) The changes in week six are minimal, especially in Will Work for Food, and should expand on the already fully capable armies you have.

Thornfall Alliance Will Work for Food
More shooting is added to this list in the final week, this time in the form of artillery! We are going to add two Farrow Razorback Crew, shuffling the free points to these mobile shooting platforms. While slow (SPD 3, 4 with the grunt) and not very accurate (RAT 4 is hard), they do have a place in this list. Lord Carver helps their RAT with his Veteran Leader ability, while Advance Deploy and Reposition [3"] means they can keep up with your army. And RNG 14, POW 14 missiles can hurt lots of opposing nasties - especially with Brutal Damage on a direct hit. They really enjoy a run-and-gun type of style: moving up, shooting, then repositioning back out of harm's way.

The last points for the week are going to go to a min unit of Farrow Commandos. With the same stats as the Brigands, they may seem like a less useful unit than another unit of Brigands, but their real advantage comes from the Thornfall Alliance theme - the Commandos get to Ambush! That allows these sneaky buggers to get into your opponent's backfield and hunt support solos or contest flags or zones.

Lord Carver, BMMD, Esq. III [+28]
- War Hog [15]
- War Hog [15]
- Battle Boar [7]
- Razor Boar (2) [7]
Lanyssa Ryssyl, Nyss Sorceress [4]
Farrow Brigands [15]
- Farrow Brigand Warlord [4]
Farrow Brigands [15]
- Farrow Brigand Warlord [4]
Farrow Commandos (min) [9]
Farrow Razorback Crew [0]
Farrow Valkyries [8]


This week is simple - add a support unit and ANOTHER heavy. First, we are going to add a minimum unit of Farrow Bone Grinders. These guys really come along for Craft Talisman, allowing Dr. Arkadius to stay even further back from the front lines. They can also do serious damage to opposing warbeasts, rolling 4D6 on charge and applying Grievous Wounds. And, if necessary, they make great targets for the Witch Doc's Sacrificial Strike ability. :)

And finally, we are going to add a second Road Hog. That gives the list three SPR10 attacks, all at POW12! And two of the cause continuous fire while the last gives continuous corrosion. Talk about a nightmare for opposing infantry! By the way, this new warbeast makes the Mist Speaker free as well.

On a side note, a Road Hog can threaten 28" with a fully boosted spray attack under Dr. Arkadius - that's insane!


Dr. Arkadius [+32]
- Road Hog [16]
- War Hog [15]
- War Hog [15]
- Battle Boar [7]
- Battle Boar [7]
- Razor Boar (2) [7]
Dahlia Hallyr [17]
- Skarath
Bog Trog Mist Speaker [0]
Gatorman Witch Doctor [0]
Lanyssa Ryssyl, Nyss Sorceress [0]
Kwaak Slickspine & Gub [0]
Farrow Bone Grinders (min) [5]
Swamp Gobber Bellows Crew [2]


And there you have it - two very serviceable armies that will be able to take on most opponent's. In a more competitive environment, the Razor Boars from both armies will most likely be dropped. For Lord Carver's Thornfall Alliance army, he would also probably drop the Commandos and take a third War Hog (I like the three initial attacks on the War Hog over the flame thrower on the Road Hog for Lord Carver). For Dr. Arkadius' Will Work for Food list, I would probably add a second Battle Boar. This gives two Primal bots, as well as good infantry clearing capability. I know others argue for Gorax Ragers over Battle Boars, and since they are the same points, it wouldn't change the list that much.

Thanks for reading!

Wednesday, January 24, 2018

Journeyman League - the Butcher


A few days ago, I posted that my gaming group (small though it is) has started a Journeyman League. This was to get us old veterans into checking out a new army and, hopefully, bring in some new players. We did get one new player (he played back in Mk I), and we have two newer players that are restarting their learning experience from the bottom.

One of the perks of the being a veteran in the group, and to provide a little more variety, is that a veteran can run two armies - one from each of the systems. So, in this article, I'd like to run through the Journeyman progression for my Butcher list.

First, to review, our modified Journeyman rules are as follows:
1) A player may start using any prime warcaster/warlock (which means they have a '1' next to their name). You must start with a 0-point army, and must spend enough points to be within 4 points of each point level.
2) Character warjacks/warbeasts are not allowed in the first week. However, provided you have the points, you may add them at any point increase.
3) Every two weeks, the army will increase in points by 15 points. The first increase in points is still battlegroup only (only warjacks/warbeasts).
4) Points will not be scored, as participation is encouraged more as we attempt to add new players. In future JML's, we will revisit scoring.
5) All other rules for the JML are followed.


Before I continue, I have to make a confession - this list hurt my wargamer soul when I purchased the battlegroup. I have always stated I would never own, let alone play, the Butcher - any version of him. I really dislike him in the fluff, and feel he should be put down like a rabid dog. It also doesn't help that Butcher3 has murdered me in many a fashion, multiple times. However, the Butcher is right down my wife's play style - run forward and apply axe-to-face as hard and as often as necessary, and then do it some more. So, when getting her excited about the JML, I tried to talk her out of playing her Cryx and play the Butcher instead. She didn't, though she did change warcasters from Deneghra1 to Skarre1. I had spent so much time talking about the benefits of Butcher, and spent so much energy trying to get her invested in him, that I just couldn't allow him not to be played in the JML. So, I bought him - and have played one game with him. And I'm sad to say, he was a blast! (Shh - not so loud!) So now, I admit to feelings of guilty pleasure every time I think about him.

With that confession - may the gamer gods have mercy on my soul - I present my Butcher lists:

@ 0-points
Orsus Zoktavir, the Butcher of Khardov [+28]
- Kodiak [13]
- Kodiak [13]

This battlegroup is made for one reason - Adam Thies. He's a good friend of mine who runs Butcher3 very well, and I've seen the effectiveness of the Kodiak. Heavy Boiler for extra movement, Vent Steam to clear infantry and make clouds, and Chain Attack: Grab & Smash for free power attacks make this warjack a bargain for 13 points. Add in MAT 7 and P+S 16 fists and you have a powerful melee threat. And with natural Pathfinder, he can come from unexpected angles. That's why I take two (that, and so I can play 2 points down).

@ 15-points
Orsus Zoktavir, the Butcher of Khardov [+28]
- Ruin [17]
- Kodiak [13]
- Kodiak [13]

So what to add to the battlegroup to make it better, you ask? RUIN! (hint - that's why I played two points down last week ;-) ) Butcher's character warjack is a beast, a bigger beast than Beast09 (ok, that was bad - it sounded better in my head). Sacred Ward prevents enemy spells being cast on him, Soul Taker lets him have FIVE soul tokens (allowing him to negate spells or trade for focus), and his Bond to Butcher gives him Relentless Charge (so more Pathfinder and extra movement for the "slow" Khador warjacks). His MAT 8 (yes, you read that right) allows you to accurately hit with the fist (the same fist as a regular Kodiak) and the black iron mace (a wicked cool P+S 18 reach weapon that Dispels!). All-in-all, a fitting addition to the Butcher's battlegroup.

@ 30-points
Orsus Zoktavir, the Butcher of Khardov [+28]
- Ruin [17]
- Kodiak [13]
- Kodiak [13]
Man-o-War Shocktroopers [10]
- MoW Shocktrooper Officer [4]

I thought long and hard at this point level, as it would change my list drastically. This is because at first glance, I wanted to run Jaws of the Wolf. Eight Khador heavies (which I have!) could really put the damper on an opponent. But ... I decided not to for two reasons: 1) the JML is supposed to be fun, and I don't think anybody can have fun facing eight Khador heavies and 2) I love the Man-o-Wars, and was ecstatic when their theme force dropped. So, I decided to run Armored Corps (eventually) and started with the largest number of Man-o-Wars I could take at a 15-point increase.

@ 45-points
Armored Corps theme
Orsus Zoktavir, the Butcher of Khardov [+28]
- Ruin [17]
- Kodiak [13]
- Kodiak [13]
Man-o-War Kovnik [0]
Man-o-War Drakhun [9]
Man-o-War Shocktroopers [16]
- MoW Shocktrooper Officer [4]

Ok, now that I have the basic Man-o-Wars I'm going to run in this list, let's examine each of them - and realize why I like them so much!
- Man-o-War Shocktroopers (and their Officer): MAT 7, ARM 17 (that climbs to ARM 21 with Shield Wall), P+S 14, RNG 2 halberds. That sums up these guys fairly well. They even have Combined Melee for the really hard targets. With eight wound boxes (more than almost any other heavy infantry), they have 48 wounds in the unit (counting the Officer). Speaking of the Officer, he's got +1 MAT and +1 POW on his axe (which also has Critical Freeze). But what really makes him shine is what he does - Granted: Assault lets you USE those shield cannons now (and let's be honest, who doesn't like POW 14 guns); Tactics: Steady and Tactics: Sturdy means they aren't going anywhere they don't want to. The really cool one there is Sturdy - no pushing these big guys around!
- Man-o-War Kovnik - He's basically another Man-o-War, with one MAJOR difference - Desperate Pace. Being able to make the incredibly slow Man-o-Wars essentially SPD 6 (yeah, I know, it's not really the same thing, but close enough) gets the hard hitting powerhouses up the field faster, and makes it much harder to jam them out of scenario.
- Man-o-War Drakhun - A light warjack on a horse!! That's basically what this guy is, with 18 boxes (between mounted and dismounted versions). And his MAT 8, P+S 14 weaponmaster blade will do some serious damage to opponent's infantry (and even 'jacks). Too bad he only gets one attack :-/ Beyond that, he's also ARM 20 (due to his shield) and Steady as long as he's mounted. With SPD 7, he's also going to get where he needs to quickly, along with Countercharge to provide an extra threat.

@ 60-points
Armored Corps theme
Orsus Zoktavir, the Butcher of Khardov [+28]
- Ruin [17]
- Kodiak [13]
- Kodiak [13]
Man-o-War Kovnik [0]
Man-o-War Drakhun [9]
Man-o-War Shocktroopers [16]
- MoW Shocktrooper Officer [0]
Man-o-War Shocktroopers [16]
- MoW Shocktrooper Officer [4]

Simple addition this point level - add in another full unit of Shocktroopers with their Officer. The Officer is free because of the theme :-)

@ 75-points
Armored Corps theme
Orsus Zoktavir, the Butcher of Khardov [+28]
- Ruin [17]
- Kodiak [13]
- Kodiak [13]
Man-o-War Kovnik [0]
Man-o-War Drakhun [9]
Man-o-War Shocktroopers [16]
- MoW Shocktrooper Officer [4]
Man-o-War Shocktroopers [16]
- MoW Shocktrooper Officer [4]

And finally, adding another Kovnik and another Drakhun. This gives me a Kovnik for each unit and a Drakhun for each flank (or maybe I run them together, for mutual support - options!).

There's the list, and I think it will be a very tough nut to crack. Shield Wall Shocktroopers are ARM 21, Drakhuns and warjacks are ARM 20, the Butcher and the Kovniks are ARM 18. All have at least 8 boxes, making the whole army extremely good vs. attrition, and with the speed buff from the Kovniks can get upfield fast enough not get pushed out on scenario. It's not really geared towards assassination, but Butcher is always an assassination threat. I think it's got a lot going for it!

Thanks for reading, and feel free to post any comments you may have!

Monday, January 22, 2018

Journeyman League - Barnabas


A few days ago, I posted that my gaming group (small though it is) has started a Journeyman League. This was to get us old veterans into checking out a new army and, hopefully, bring in some new players. We did get one new player (he played back in Mk I), and we have two newer players that are restarting their learning experience from the bottom.

One of the perks of the being a veteran in the group, and to provide a little more variety, is that a veteran can run two armies - one from each of the systems. So, in this article, I'd like to run through the Journeyman progression for my Barnabas list.

First, to review, our modified Journeyman rules are as follows:
1) A player may start using any prime warcaster/warlock (which means they have a '1' next to their name). You must start with a 0-point army, and must spend enough points to be within 4 points of each point level.
2) Character warjacks/warbeasts are not allowed in the first week. However, provided you have the points, you may add them at any point increase.
3) Every two weeks, the army will increase in points by 15 points. The first increase in points is still battlegroup only (only warjacks/warbeasts).
4) Points will not be scored, as participation is encouraged more as we attempt to add new players. In future JML's, we will revisit scoring.
5) All other rules for the JML are followed.


For my Hordes army, I decided to run Barnabas. I did this for several reasons:
- One of my goals for 2018 is to have all of my Minions fully painted by the end of the year. This list (more on it later) will have me painting two full units of Posse (I do have two painted, but need a "reason" to paint the other two), as well as many of the new units coming out in a couple of weeks. It will also force me to paint my unit of Bog Trog Swamp Shamblers. :-)
- I really like Bloody Barnabas, but the model for Barnabas, Lord of Blood is amazing! I am relatively sure he is going to be my new favorite.
- I am really familiar with Minions, even the Gator side, and so will be able to concentrate more on the new models, rather than having to stress a completely new army.

With all of that being said, let's delve into the army as it progresses from a 0-point battle box to a fully fledged (and hopefully fully painted) 75-point army.

@ 0-points
Bloody Barnabas [+28]
- Blackhide Wrastler [16]
- Boneswarm [7]
- Bull Snapper [5]

This is straight out of the rules as one of the battle boxes for Minions. Truthfully, though, it's not very good for Barnabas. Barnabas likes infantry with his spell list, and he likes shooting with his Feat. Neither of those are present in this list. However, this sets up Barnabas2 really well! With a couple additions to his battlegroup, Barnabas2 will do well. So, I will just have to weather the storm until I reach 45 points.

@ 15-points
Bloody Barnabas [+28]
- Blackhide Wrastler [16]
- Boneswarm [7]
- Boneswarm [7]
- Boneswarm [7]
- Bull Snapper [5]

As you can see, I simply added two Boneswarms - again with the Barnabas2 list in mind. Boneswarms are going to be good, I think, as soon as the Boil Master/Spirit Cauldron are released. With the ability to easily get corpse tokens, these relatively light-hitting warbeasts become as hard-hitting as heavy warbeasts! And as hard to remove! :-) Again, this is not really optimal for Barnabas1, especially without the ability to easily gain corpse tokens (an Ironback Spitter would probably be better), but the intention is to change to Barnabas2, so they work.

@ 30-points
The Blindwater Congregation theme
Bloody Barnabas [+28]
- Blackhide Wrastler [16]
- Boneswarm [7]
- Boneswarm [7]
- Boneswarm [7]
- Bull Snapper [5]
Gatorman Posse [16]

Playing one point down during the last session helped, as it allows me to add a Posse. And being able to add the Blindwater Congregation theme makes those Posse members bigger and nastier! With 40 wounds in the unit, they become an excellent target for Death March (+2 MAT and Vengeance never hurts anybody) but, more importantly, they are still excellent under Barnabas2, becoming much more survivable thanks to Execration of Blackest Night and faster with Onslaught.

@ 45-points
The Blindwater Congregation theme
Barnabas, Lord of Blood [+23]
- Gatorman Soul Slave [0]
- Blackhide Wrastler [16]
- Boneswarm [7]
- Boneswarm [7]
- Boneswarm [7]
- Bull Snapper [5]
Gatorman Posse [16]
Gatorman Bokor & Bog Trog Swamp Shamblers [10]

Awesome-sauce! It's time to transition into Barnabas2 and get ready for the excitement to start. While still not completely optimal, it's getting closer. While 5 points are lost in the transition to Barnabas2 (due to warbeast point differentials), it's (kind of) made up for by being able to take the Soul Slave for free. At this point level, a unit of Shamblers is added (making great Feat targets), which allows me to add the Soul Slave for free. The Soul Slave, I think, is going to be very common with Barnabas2, allowing him to upkeep Onslaught for free and casting Hunter's Mark or Blood Rain as needed. And while his Magic Ability [4] is kind of disappointing, he can boost if he needs to. :-)

@ 60-points
The Blindwater Congregation theme
Barnabas, Lord of Blood [+23]
- Gatorman Soul Slave [0]
- Blackhide Wrastler [16]
- Boneswarm [7]
- Boneswarm [7]
- Boneswarm [7]
- Bull Snapper [5]
Bone Shrine [2]
Bone Shrine [2]
Gatorman Posse [16]
Gatorman Bokor & Bog Trog Swamp Shamblers [10]
Boil Master & Spirit Cauldron [5]

The list is starting to come together! :-) The Boil Master is now here, two of them in fact, fueling Barnabas, the Boneswarms, and the Bokor with his Shamblers. The hitting power and survivability of this army has amped up, and the Bone Shrines give the ability to channel spells (probably situational) and Fury for Barnabas to more fully whack an opposing army.

@ 75-points
The Blindwater Congregation theme
Barnabas, Lord of Blood [+23]
- Gatorman Soul Slave [0]
- Blackhide Wrastler [16]
- Boneswarm [7]
- Boneswarm [7]
- Boneswarm [7]
- Bull Snapper [0]
Kwaak Slickspine & Gub, Croak Sorcerers [4]
Bone Shrine [2]
Bone Shrine [2]
Gatorman Posse [16]
Gatorman Posse [16]
Gatorman Bokor & Bog Trog Swamp Shamblers [10]
Boil Master & Spirit Cauldron [5]

Again playing a point down last level allows me to bring in a max unit of Posse - increasing both my hitting power and my survivability. This also allows me to take the Bull Snapper for free, letting me put Kwaak Slickspine & Gub into the list. I'm not completely sold on these guys, I think Mud Foot is likely a trap and not being able to avoid free strikes makes Enliven less appealing, but I'm willing to give them a shot. Heal [D3] is always nice, especially when cast twice, as is a SP8, POW10 magic attack that causes Corrosion. But I'm also looking at Long Chops - RNG12 POW14 is tailor-made for solo hunting. Or I could just add the Bull Snapper's points back in and take a Totem Hunter. As stated, this will require some testing.

All in all, this will be a fun list. Lots of bodies to provide scenario pressure, the ability to trade up warbeasts and infantry recursion to help in the attrition game, and a 'caster who provides a serious melee assassination threat make this a fun list - especially in a JML - that has all of the tools to handle multiple situations and win conditions. And while he's not a Butcher3, I think Barnabas2 is going to be a melee monster!

Thanks for reading, and feel free to leave any comments you may have!

Sunday, January 14, 2018

Journeyman League 2018

We have officially started our Journeyman League here on the Palouse, and it's off to a ... slow start. :-) When I started this, there were three new people interested in joining us, as well as two people who've played only a little, and then three veterans. On the first day, we had three people come. :-(

But, this next week should go a lot better. One of the new people is coming (I don't think the other two are, but hopefully), one (maybe both) of the "journeymen", and hopefully all three veterans. It will be fun!

For this league, the veterans have the option of playing two armies - one from Hordes and one from Warmachine. Mainly, this is because we have large enough collections that we can build armies that are diverse enough to give everybody a different army, as well as the experience to be able to effectively do it. We are mostly following the Journeyman League 2017 rules (found here), with a couple modifications:
- Battle box armies are not required at the start. You can build any 0-pt army you want, with the caveat that your warcaster/warlock has to be a Prime version (so have a '1' after their name).
- No character warjacks/warbeasts in the first week.
- Two weeks between each point increase.

So, with all of that said, we had two games happen this week (I went back on Friday and played my game). The first was a Cryx vs. Cryx slugfest! Skarre1 faced off against Asphyxious1:

Pirate Queen Skarre [+28] Iron Lich Asphyxious [+28]
- Seether [13] - Reaper [13]
- Deathripper [6] - Ripjaw [7]
- Defiler [8] - Ripjaw [7]

In a wild ride, Asphyxious won by assassination, but we found out later that there are two victory conditions - assassination or killing all of the enemy's warjacks. This would have resulted in a Skarre victory.

The second (my game) was Barnabas1 into Reznik1 - which when I looked at the models facing me, had me really worried! The lists consisted of:

Bloody Barnabas [+28] High Executioner Reznik [+28]
- Blackhide Wrastler [16] - Castigator [12]
- Boneswarm [7] - Reckoner [16]
- Bull Snapper [5]

As you may have noticed, there's a distinct lack of ability to handle the two heavies the High Executioner is bringing to the table. Luckily, I won the roll to go first, moving up into Barnabas' Swamp Pit the first turn. The second turn, he moves up base-to-base with an obstruction and puts the Swamp Pit right in front of the two Protectorate heavies. The Blackhide then moves up within 9", so he will be able to charge the next round. The two lights move up beside him, to provide some support.

Reznik moves up on his turn and attempts to hit Barnabas with the hopes of dropping the Swamp Pit (still not sure if this would work). However, due to the obstruction giving cover, he misses! Realizing Reznik is exposed, he runs the Castigator into melee range of the Blackhide and the Boneswarm, and covers Reznik with the Reckoner.

Barnabas then moves over (on turn 3), puts Rage on both the Boneswarm and Bull Snapper, and feats. The Blackhide demolishes the Castigator (though it took all of his Fury), and then the two lights charge Reznik, killing the Protectorate priest! Wahoo, Gators win their first game! :-)

So, as stated earlier, veterans get to run two lists. Below are my two lists, with their (expected) progressions through the Journeyman League:

@ 0-points
Bloody Barnabas [+28] Orsus Zoktavir, the Butcher of Khardov [+28]
- Blackhide Wrastler [16] - Kodiak [13]
- Boneswarm [7] - Kodiak [13]
- Bull Snapper [5]

@ 15-points
Bloody Barnabas [+28] Orsus Zoktavir, the Butcher of Khardov [+28]
- Blackhide Wrastler [16] - Kodiak [13]
- Boneswarm [7] - Kodiak [13]
- Boneswarm [7] - Ruin [17]
- Boneswarm [7]
- Bull Snapper [5]

@ 30-points
Bloody Barnabas [+28] Orsus Zoktavir, the Butcher of Khardov [+28]
- Blackhide Wrastler [16] - Kodiak [13]
- Boneswarm [7] - Kodiak [13]
- Boneswarm [7] - Ruin [17]
- Boneswarm [7] Man-o-War Shocktroopers [10]
- Bull Snapper [5] - MoW Shocktrooper Officer [4]
Gatorman Posse [16]

@ 45-points
The Blindwater Congregation Armored Corps
Barnabas, Lord of Blood [+23] Orsus Zoktavir, the Butcher of Khardov [+28]
- Gatorman Soul Slave [0] - Kodiak [13]
- Blackhide Wrastler [16] - Kodiak [13]
- Boneswarm [7] - Ruin [17]
- Boneswarm [7] Man-o-War Kovnik [0]
- Boneswarm [7] Man-o-War Drakhun [9]
- Bull Snapper [5] Man-o-War Shocktroopers [16]
Gatorman Posse [16] - MoW Shocktrooper Officer [4]
Gatorman Bokor & Swamp Shamblers [10]

@ 60-points
The Blindwater Congregation Armored Corps
Barnabas, Lord of Blood [+23] Orsus Zoktavir, the Butcher of Khardov [+28]
- Gatorman Soul Slave [0] - Kodiak [13]
- Blackhide Wrastler [16] - Kodiak [13]
- Boneswarm [7] - Ruin [17]
- Boneswarm [7] Man-o-War Kovnik [0]
- Bull Snapper [5] Man-o-War Drakhun [9]
Bone Shrine [2] Man-o-War Shocktroopers [16]
Bone Shrine [2] - MoW Shocktrooper Officer [4]
Gatorman Posse [16] Man-o-War Shocktroopers [10]
Gatorman Bokor & Swamp Shamblers [10] - MoW Shocktrooper Officer [4]
Boil Master & Spirit Cauldron [5]

@ 75-points
The Blindwater Congregation Armored Corps
Barnabas, Lord of Blood [+23] Orsus Zoktavir, the Butcher of Khardov [+28]
- Gatorman Soul Slave [0] - Kodiak [13]
- Blackhide Wrastler [16] - Kodiak [13]
- Boneswarm [7] - Ruin [17]
- Boneswarm [7] Man-o-War Kovnik [0]
- Bull Snapper [0] Man-o-War Drakhun [9]
Kwaak Slickspine & Gub, Croak Sorcerers [4] Man-o-War Drakhun [9]
Bone Shrine [2] Man-o-War Shocktroopers [16]
Bone Shrine [2] - MoW Shocktrooper Officer [4]
Gatorman Posse [16] Man-o-War Shocktroopers [16]
Gatorman Posse [16] - MoW Shocktrooper Officer [4]
Gatorman Bokor & Swamp Shamblers [10]
Boil Master & Spirit Cauldron [5]

That's the next three months - hopefully by the end I will have two fully painted 75-point armies!

Wednesday, April 12, 2017

Battle Report #6: Khador (Sorscha) vs Cryx (Deneghra)

Second game with my wife, this time with a better understanding of just how scary Deneghra can be, especially in small games. However, I don't think I will give as much help to my wife, so maybe I can do a little better ;)

Same lists as the first game:
Sorscha
- Destroyer
- Destroyer

Deneghra
- Twitch (Slayer)
- Spew (Defile)
- Gimpy (Deathripper)
- Clank (Deathripper)

The rolloff for first turn was won by me, and I elected to go first.

Khador - Turn 1
In retrospect, I probably should have went second. :/ The Destroyers move on, along with Sorscha. Focus is allocated, but not used. Everybody simply walks forward. Mainly because I am trying to stay as far from Deneghra as possible, until I'm ready to put the smackdown on. Sorscha does cast Wind Rush for +2 DEF.


Cryx - Turn 1
Cryx moves on the board on the left side, moving halfway up the board thanks to how fast they are. Holy crap! Moving 7" on and then running 14" is really huge when the board is only 30" wide. Gimpy runs into the center woods, with Spew moving in behind him (but out of the woods). Clank ran up the left side, approaching the flag. Twitch advanced to 10" away from my Destroyer. Deneghra walked up, and arced a couple boosted Venoms onto Sorscha and the Destroyer, for no real damage.

No picture of this turn.

Khador - Turn 2
So, I kept out of Deneghra's feat range, which was nice, and now lets kill some 'jacks. First, I made a big mistake here. I forgot about Boundless Charge. I knew that Twitch was 10" away, and assumed I wouldn't be able to get to him because I was only SPD 4. However, Boundless Charge gives +2" of movement on the charge, so I could have gotten to him. Then a couple of whacks with my axe and I could have easily dropped the heavy.

Instead, Sorscha hit Gimpy with a boosted Freezing Grip, making the little guy Stationary (and DEF5). The Destroyers then sat still and aimed at him, wanting to remove the arc node. The two shots left Gimpy on only 3 boxes, with cortex and movement out. Not exactly the result I was looking for.


Cryx - Turn 2
This is where my wife completely surprised me. Rather than advancing or charging everything into my 'jacks, she repositioned. Clank moved into base with the flag on the left. Gimpy moved out of the woods to the right, and Spew ran to base the flag on the right. Deneghra moved around the woods, used her Feat, and cast Scourge onto the Destroyer next to Sorscha, knocking them both down. She then hits Sorscha with Crippling Grasp.

Twitch then charged into the Destroyer and tried to whack him. It didn't go well. :)

No picture of this turn, again.
Score 0-2
Advantage Cryx

Khador - Turn 3
Hmm, that's not good. I didn't expect her to go for scenario. I need to contest the right flag, or she's going to win by moving Deneghra into base contact (and losing on scenario in a Rumble would be embarrassing). So the right hand Destroyer moves up 2" (his new speed *sigh*) to be (just barely) within 4" and shoots into the cluster of 'jacks and Deneghra. He kills Gimpy, knocks out the head and cortex of Spew, and puts a couple damage boxes onto Deneghra (she ignores five of it, though).

Sorscha stands up, feats, and moves to the right a little, to support that Destroyer. The left Destroyer stands up and prepares to wale on Twitch - but not killing him!! Three focus, and I left Twitch on two boxes. *shakes head*
Cryx should have scored another point, but we spaced it.


Score: 0-2 (should be 0-3)
Advantage Cryx

Cryx - Turn 3
She knows she's got me on the ropes, so upkeeps Crippling Grasp, and shakes Stationary on herself and her 'jacks (sitting on 1 focus), and runs through the forest to the left side flag (away from all my stuff), basing the flag. Clank then charges the Destroyer, scratching his paint, and Twitch does some more scratching.

Spew limps forward and blocks out the right-hand Destroyer. Cryx scores two points.

Score: 0-4 (should be 0-5)
Advantage Cryx
Khador - Turn 4
Only one chance to win - assassination. Destroyer backs up, taking two free strikes. Twitch does nothing (both his arms are crippled) but Clank hits. Sadly, he does the perfect amount of damage to disable the Destroyer's gun :( So boosting to hit only gives me two dice, and I miss. Scatter comes back and to the side forever and a day, so nothing. Sorscha Wind Rushes (getting close in melee range of Twitch), casts Boundless Charge (because Crippling Grasp stole 2" SPD), and charges Deneghra (Twitch missed the free strike on one die). Both Sorscha and Deneghra are now bssing the flag. I need to boost to hit, though (Crippling Grasp again) and ... miss. Buy an attack and pray ... and hit! Wahoo - but I only do five damage, which Deneghra voids with her last focus. :(

No picture this turn...
Score 1-4
Advantage Cryx

Cryx - Turn 4
She just smiles, and wins on scenario 1-6. Actually, she won the previous round 0-5, but oh well.

The happy victor

Time for a rematch, again, but I've really got to find a way to defeat Deneghra or my wife is going to roll all over me. Honestly, I don't even have any real take-aways except fighting Deneghra sucks...

Saturday, April 8, 2017

Battle Report #5: Khador (Sorscha) vs Cryx (Deneghra)

As stated earlier, I'm starting a slow-grow, teaching "league" with my wife, Melissa. We have both of our battle boxes painted, and were finally able to get some games in last week.

Both of our battle boxes were chosen based on multiple criteria, but the main was that I already owned the battle boxes. After that, Melissa wanted the opportunity to build her own battle box, and paint her army. Since Khador is my second army (after Minions), I finished building and magnetizing the Khador battle box (by the way, in case you missed the earlier posts, these are Mk II battle boxes) to match against Melissa's Cryx. However, there was too large of a discrepancy in points for the standard battle group, so it was changed slightly.

My army:
Kommander Sorscha [+29]
- Destroyer [14]
- Destroyer [14]


Melissa's army:
War Witch Deneghra [+28]
- Clank - Deathripper [6]
- Gimpy - Deathripper [6]
- Spew - Defiler [8]
- Twitch - Slayer [10]


A quick addition shows Khador is at -1, and Cryx is at +2. :) But, I'm not worried - I'm an experienced Warmachine player and Melissa is just a beginner. ;)

First, since we were playing such small games, we were using the Rumble rules. For those who have never played, the rules for a Rumble game are as follows:
- The board is 30x30
- Armies are not deployed on the board at the beginning of the game.
- When deploying, models are moved onto the board their speed. Once all a player's models have been moved on, that player's first turn starts.

Our board was set up, with a simple two flag (control for 1 CP, dominate for 2 CP) scenario, though it would be highly unlikely that the scenario would come into play. Also, we were playing a fairly simple ruleset (no Advanced Rules or anything funky), giving my wife an opportunity to get her feet wet without lots of things to remember.


Khador - Turn One:
Cryx won the roll-off, and she decided to go second. So, Khador moved onto the board centrally, and then ran both 'jacks towards the flags (trying to get into good firing locations). Sorscha cast Wind Rush, and then advanced into the woods. With no targets, that was my turn.


Cryx - Turn One:
First, let me say Cryx are fast. Really fast! That was really a surprise for me. After Melissa moved her army onto the field 7" (everything but the Slayer anyway), we discussed strategy and possible avenues of attack. One of the things that drew this faction to my wife was that it was made up of very fast, hard hitting, but fragile, components. She really digs the glass cannon concept.

So, after discussing possible first turns, she selects her favorite scenario and starts. First, she moves Clank to the edge of the hill, 8" from Sorscha. Next, she moves Gimpy up in front of Deneghra to provide some protection. Deneghra then moves up and Feats. She then attempts to arc a boosted Parasite into Sorscha (from Clank) but misses. However, her feat catches my whole army (all three models), which really hurts. Spew advances and attempts to spray Sorscha, catching the Destroyer as well. She doesn't roll well, missing the boosted shot into Sorscha, but it does catch the Destroyer (no damage, but it is now Corroded). Then, Twitch charges Sorscha. The monster misses his charge attack, but does get two hits on her, so Sorscha uses focus to blunt them slightly and is sitting on about half health.


My wife showing her happy face!

Khador - Turn Two:
Hmm, that's a little not nice. -2 to every stat, no charges, runs, or slams makes this turn difficult. And I thought SPD 4 warjacks were slow - try SPD 2! And then I see that Sorscha's feat requires LOS (I didn't know that before). So rather than Feating and then moving, she has to move first to catch Deneghra.

Realizing this, Sorscha advances around Twitch, engaging Spew as well, and Feats. This catches the board, making all enemies stationary. She then proceeds to ... roll really horribly, unable to even scratch the Slayer on three of her seven attacks. When she finishes, Twitch is still on several boxes, with only its movement out (which didn't help me much, as it was still stationary).

So, after some measuring and weighing my options, I sent the Destroyer into Twitch (Twitch was barely under 3" away). He killed it in one swing (Melissa had to leave him lying there for one round :) ). The other Destroyer moved up slightly and dropped a shot onto Gimpy, in front of Deneghra. One thing noted AFTER our games were played was that Deneghra has Stealth - she didn't need the protection of Gimpy, and it actually made her more vulnerable. Gimpy loses everything but Cortex, and Deneghra loses a few boxes.


Cryx - Turn Two:
I didn't cast Wind Rush the previous turn (I needed all the focus to smack Twitch) - big mistake! After talking some more about the strategy, Melissa shook stationary from Clank and Deneghra. Deneghra then activated and sent a boosted Scourge into Sorscha. She wasn't in the forest (not completely in, my mistake!) and was no longer engaged/engaging Spew (he was stationary, so can't be engaged) so she was only DEF 16! Serious mistakes on my part, I was expecting her to be DEF 20+. Scourge hit, did a couple damage, but more importantly knocked her down.

Clank walks forward, autohits because she's knocked down, does damage, buys an attack (from the Power Up focus) and kills Sorscha.


The happy victor!

Cryx Victory!!

Well, that was a little ... surprising. Yes, my wife had help discussing strategy - which actually helped me as well. As the game progressed and we talked about various moves, I saw my mistakes. Hopefully, this will help me alleviate them in the future (and help her become a better player, too)!

Lessons learned:
- Deneghra is brutal in small games. Yes, she's good regardless, but in the close quarters of Rumble and the few models to mitigate her Feat, she is crazy, nasty effective.
- Khador is a new army for me in Mk III - quit assuming I know how everything works because I played them in Mk II (a little). Read the cards, pay attention to detail, and stop with the tunnel vision!
- Protect your warcaster! I kept pointing this out to Melissa, wanting her to understand this important concept, and then completely ignored it for myself. DUMB!

Thanks for reading!

Wednesday, March 22, 2017

Cryx Journeyman League

As mentioned earlier, my wife has decided to start playing Warmachine with me. She has decided to play Cryx, building and painting the Cryx MkII Battlebox. On one hand, this makes for a fun toolbox to introduce her to MkIII, including 'jack interactions, spells, arc nodes and what drew her to Cryx in the first place - glass cannons!

One thing she has been pretty adamant about is playing with painted models. This one another reason she was interested in playing Cryx - I had a NIB MkII Cryx Battlebox :) So, first she assembled all of her models (well, all but the Defiler, which I did). Then, we spent a few days browsing the internet looking for a good color scheme. After finding several, and then discounting most of them due to the advanced techniques, we settled on a scheme that I was fairly confident a new painter could recreate.

With the scheme determined, the models built (and primed), it was time to start painting. I didn't take any in progress photos, so it's just the finished models.

Warcaster: Deneghra

Heavy Warjack: Slayer (she calls him Twitch)

Light Warjacks: Deathrippers (she calls them Clank and Gimpy)

Light Warjack: Defiler (she calls him Spew)

And her battlegroup

She named all of her 'jacks (because my wife is funny that way). She called the Slayer "Twitch", because she liked the name. Her two Deathrippers are Clank (because one of them has a crooked jaw, so she says he rattles when he attacks) and Gimpy (because his leg broke during assembly, so is pinned/glued together). The Defiler is Spew - it was her favorite synonym of vomit :) Finally, for our anniversary, I bought, assembled, and painted Deneghra's character warjack, Nightmare. This is the next step we will advance to - our 25-point lists will be the Battlebox + character 'jack + a solo (hers will be a Satyxis Raider Captain).

Character Warjack: Nightmare

Now ready to play a game - though her work schedule has been crazy lately so we haven't had much time to play. Hopefully we will get the chance in the next couple of days.

Tuesday, March 21, 2017

Khador Journeyman League

I recently (actually, it's been a month, holy cow!) talked my wife into playing Warmachine with me. After a lot of discussion over armies, models, and aesthetics, she decided she wanted to play Cryx (I think mostly because I had a MkII Battlebox unassembled at home). Since trying to teach two systems to her would be overwhelming, I decided I would play my Khador against her.

I then discovered I had married a gaming snob. She won't play with unpainted miniatures! She also won't play against unpainted miniatures! Oh, man - that means I actually have to paint my Khador! (Man, that's a lot of excitement there) She wanted to learn the complete hobby process, and I think she wanted me to pick up my brush because I've been missing it for a while (shaky hands to not make for perfect miniatures). So, as we start on this journey, I paint my Khador.

First, the scheme. I don't like all red armies, so I spent a lot of time thinking of what scheme I wanted my Khador to be. I kept coming back to the 5th Border Legion. So, rather than fight it, gave in and picked that scheme!

In another post, as I paint more of these guys, I will discuss the colors used to paint my Khador. For now, just pictures!

Since my wife was using Cryx's MkII Battlebox, I thought I would use Khador's MkII Battlebox. However, she has a distinct advantage, as the MkIII points puts her way ahead. Oh, well.

Warcaster: Kommander Sorscha

Heavy warjack: Destroyer (they call him Thumper!)

Heavy warjack: Destroyer (Boom-shakka)

And a group shot of her battle group (yes, I do realize it's not quite the MkII box, but it's close enough):

And finally, just because I'm that kind of guy, I've magnetized both of the heavy 'jacks! That's right, I can run them as Juggernauts or Destroyers (or Decimators, when I get the bits) :)

On another front, when we jump up to 25 points, each of us will be adding our 'casters Character Warjack (in my case, Beast09) and a solo. I already had Beast09 - painted even! This was done as a commission a couple years ago, and the model is a conversion onto the plastic chassis. The only part of this model I did was the base!

Thanks for reading, and expect battle reports soon!